Blog

  • Setting Up Your Home Workshop on a Budget

    You don’t need thousands of dollars to start a functional workshop. Learn how to build a complete DIY space with smart purchases and strategic planning.

    Start Small and Grow

    The biggest mistake beginners make is buying everything at once. Start with essential tools and add as your skills and projects demand. This approach saves money and prevents tool clutter.

    The Essential Toolkit

    Begin with these basics:
    – A quality hammer and screwdriver set
    – A cordless drill-driver
    – A circular saw or hand saw
    – A tape measure and level
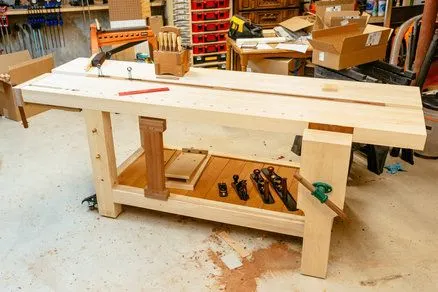
    – A workbench or sturdy table
    – Safety equipment

    These tools handle 80% of common projects. Total investment: $200-400 if you shop smart.

    Finding Deals

    Check estate sales and online marketplaces for used tools. Vintage tools are often better quality than new budget options. Pawn shops and tool rental places sometimes sell used equipment at great prices.

    Organization is Key

    A well-organized workshop is more efficient and safer. Use wall-mounted pegboards, magnetic strips, and labeled bins. Good organization makes tools easy to find and prevents accidents.

    Safety First

    Invest in proper safety equipment from day one. Safety glasses, work gloves, dust masks, and hearing protection are non-negotiable. These items are inexpensive and prevent serious injuries.

    Workspace Setup

    Your workshop doesn’t need to be large. A corner of a garage, a basement section, or even a closet can work. Good lighting and ventilation are more important than size.

    Growing Your Collection

    As you complete projects, you’ll identify tools you need. Buy quality when you do – a good tool lasts decades. Avoid cheap tools that frustrate you and break easily.

    Your workshop will grow organically into exactly what you need for your style of work!

  • Mastering Hand Joinery Techniques

    Hand joinery is the art of connecting wood without nails or screws. These traditional techniques create beautiful, strong joints that showcase craftsmanship.

    The Foundation of Fine Woodworking

    Hand joinery separates fine furniture makers from casual builders. These joints are stronger, more beautiful, and more satisfying to create than mechanical fasteners.

    Essential Hand Tools

    You don’t need many tools to start. A quality saw, chisels, marking gauge, and square are the basics. Invest in good tools – they make learning easier and produce better results.

    The Mortise and Tenon Joint

    This is the king of woodworking joints. A mortise is a rectangular hole, and a tenon is a matching projection. When fit properly, they create an incredibly strong connection.

    Start by marking your mortise carefully. Use a chisel to remove waste wood, working from both sides toward the middle. The tenon is cut on a saw, then fitted and adjusted until it slides smoothly into the mortise.

    The Dovetail Joint

    Dovetails are the signature of fine furniture. The interlocking pins and tails create both strength and beauty. They’re challenging to learn but incredibly rewarding.

    Practice on scrap wood first. Mark your pins and tails carefully, saw along the lines, and chisel out the waste. Fit and adjust until the joint slides together smoothly.

    Building Your Skills

    Start with simple projects using basic joints. As your confidence grows, tackle more complex work. Each joint you cut teaches you something new about wood and technique.

    The satisfaction of creating a perfect hand-cut joint is unmatched in woodworking!

  • Restoring Vintage Tools: A Complete Guide

    Vintage tools have character and quality that’s hard to find in modern replacements. Learn how to restore old tools to working condition and preserve their history.

    Why Restore Vintage Tools?

    Vintage tools are often made from superior materials and craftsmanship. Restoring them is more sustainable than buying new, and you’ll develop a deeper appreciation for quality workmanship.

    Assessment and Planning

    Start by examining your tool carefully. Identify rust, damage, and missing parts. Take photos before you start – they’re helpful for reference and documentation.

    Cleaning and Rust Removal

    For light rust, steel wool and white vinegar work wonders. Soak the tool in vinegar for a few hours, then scrub with steel wool. For heavy rust, consider a wire wheel on a drill or angle grinder.

    Never use harsh chemicals that damage the patina completely. The goal is to preserve the tool’s character while making it functional.

    Sharpening and Adjustment

    Once clean, sharpen blades on whetstones or sharpening stones. Adjust mechanisms carefully – vintage tools often have precise tolerances. Lubricate moving parts with light machine oil.

    Finishing Touches

    Apply a protective finish like paste wax or light oil. This prevents future rust while maintaining the tool’s appearance. Store in a dry location with silica gel packets if humidity is an issue.

    The Reward

    Using a restored vintage tool connects you to craftspeople from decades past. It’s a tangible link to history and a testament to quality that endures.

  • Crafting Custom Metal Wall Art

    Metal work is an incredibly rewarding craft that transforms raw materials into stunning pieces. Learn how to create beautiful custom wall art with basic metalworking tools.

    Getting Started with Metalworking

    You don’t need an expensive forge to start metalworking. With some basic tools and materials, you can create impressive pieces right in your garage or workshop.

    Essential Tools

    A good angle grinder is your best friend in metalworking. You’ll also need:
    – Metal files for finishing
    – Welding equipment or bolts for assembly
    – Safety gear (gloves, goggles, apron)
    – Measuring tools
    – Cutting tools

    Design Ideas

    Start simple with geometric patterns. Circles, triangles, and lines create striking visual effects. Consider your space and color scheme when designing your piece.

    The Process

    Begin by sketching your design on paper. Transfer it to metal using a marker or chalk. Cut your pieces carefully using an angle grinder with a cutting disc. File all edges smooth to prevent cuts.

    Assemble your pieces using welding or bolts depending on your skill level. Paint or apply a finish to protect the metal and add color.

    Safety First

    Always wear protective equipment. Metal dust and sparks are serious hazards. Work in a well-ventilated area and never rush the process.

    Your finished piece will be a unique conversation starter that showcases your creativity and skill!

  • Building Your First Wooden Workbench

    Building Your First Wooden Workbench

    A sturdy workbench is the foundation of any DIY workshop. In this comprehensive guide, we’ll walk you through building a solid wooden workbench that will last for years.

    Why You Need a Workbench

    A dedicated workspace keeps your tools organized and provides a stable surface for your projects. Whether you’re woodworking, metalworking, or general repairs, a quality workbench is essential.

    Materials You’ll Need

    Start with quality hardwood like oak or maple. You’ll need:
    – 4×4 posts for the legs
    – 2×6 boards for the frame
    – 1×4 boards for the top
    – 2.5 inch wood screws
    – Wood glue
    – Sandpaper (80, 120, 220 grit)
    – Finish of your choice

    Step-by-Step Instructions

    First, cut your posts to height. A standard workbench is 36 inches tall. Next, assemble the frame using pocket holes or traditional joinery. Attach the top boards and ensure everything is square and level.

    Sand everything smooth, starting with 80 grit and finishing with 220 grit. Apply your chosen finish – polyurethane works great for durability.

    Pro Tips

    Use a level constantly during assembly. Invest in quality clamps – they’re worth every penny. Don’t rush the finishing process; it makes a huge difference in the final product.

    Your new workbench will be the centerpiece of your workshop for years to come!

  • Hello world!

    Welcome to WordPress. This is your first post. Edit or delete it, then start writing!